FAQ
We get a lot of questions at Pro-Lite HQ and some questions come up more than others. We've listed some of these to give you a quick reference place to look up your questions and maybe find some other useful information as well.
- Pro-Lite
Wheels
- What type of wheel should I buy?
 This is probably the most important thing to get right. What kind of riding do you expect to be doing? We made some notes about this and you can find the article hosted on Wiggle, with convenient links to great pricing on some of our most popular wheels. Click here to read more on Wiggle.
- UCI – Are Pro-Lite wheels UCI approved?
 Some models are indeed on the approved list. The UCI introduced a new policy starting in 2016, where they list "approved" wheels on their website. On our website, you will see a UCI icon on the main wheel pages and if you visit the page of any wheel with approval, you will also see that icon proudly displayed.
Two models, the Gavia and the Vicenza, also passed UCI approved testing before this new rule and you can view their testing reports providing evidence that should be accepted by UCI officials on the product pages for your specific wheels.
You can find the approved PL models listed on the UCI site by clicking on the icon on the product page or just to the right.
- Are there any weight limits?
- We don't believe in weight limits here at Pro-Lite. We have seen enough riders who have exceptionally strong legs with a small stature to understand that you don't have to be a big guy to need a well-built wheel. Our quality standards and material choices as well as our wheel building policies based on decades of experience mean that our wheels are among the strongest on the market.
Having said that, the heavier you are and the stronger you are, the more punishment your wheels take, so certain parts such as bearings and spokes will wear out faster than if you were lighter. Some riders have seen well in excess of 10,000km on a PL wheelset without having to do anything other than adding an occasional drop of oil or grease.
- We don't believe in weight limits here at Pro-Lite. We have seen enough riders who have exceptionally strong legs with a small stature to understand that you don't have to be a big guy to need a well-built wheel. Our quality standards and material choices as well as our wheel building policies based on decades of experience mean that our wheels are among the strongest on the market.
- Best practices and tips
- On day 1, most riders take a moment to give their wheels a quick once-over visual inspection. There's always a risk that the wheel could suffer some abuse in shipping and not all wheels are purchased new.
- • Take a moment to check the rim for left and right truing issues.
- • It never hurts to drop a bit of oil into the nipples to make sure nothing has dried out.
- • Make sure the bearings spin freely, but be aware that bearings can be a little stiff if the wheel hasn't been used yet or the wheel has been sitting for a while. 99.9% of the time, the bearings will be smooth like butter after just a few minutes of riding.
- • Make sure you have your brakes set up with the correct pads and properly aligned.
- • Remember that when you install your cassette, the spacer ring is not required for 11 speed.
- • Additionally, it is very important to ensure that the cassette is torqued correctly according to the values marked on the retaining cap. Insufficient torque can allow the gears to move separately, causing a dramatic increase in force against the splines of the free body, dramatically decreasing its life and potentially leading to shifting issues.
Maintenance:- • It's a good idea to add oil to your nipples when you lubricate your chain. If you ride in the rain or wash your bike, the oil can get washed off of your chain and your nipples. Good practice will keep your nipples protected from potential corrosion as well as seizing and the dreaded problem of rounded nipples when it comes time to true up the wheel.
- • If you don't ride in the rain, it's still a good idea to lube the chain and nipples every 6 months or so or when the season changes.
- • Another thing to check when the weather turns is the cassette torque. Alloy freebodies and steel cassettes expand at different rates and when the weather changes, the cassette can loosen off.
- • If you ride frequently in the rain, marine grease can make a big difference for protecting your hub internals. Always use non-lithium grease.
- Pro-Tip: heavier riders often find that carrying a spare spoke either taped inside their seat post or to their chain stays can be a wise precaution for longer rides. This is also common among wrench-savvy racers.
Important Note: If you use carbon wheels, using the wrong type of brake pads will void your warranty.Sheldon Brown on Lubricants to AVOID: While it's hard to say which lubricants are best for chains, some lubricants are real no-nos:- • Automotive motor oil contains detergent, to wash away combustion products, and is made to be renewed constantly under pressure from the motor's oil pump.
- • "Household" oil, such as 3 in 1, is a vegetable oil and is acidic. It tends to gum up. (It's really bad news inside internal hub gears, too...)
- • WD-40 and other thin sprays (ie GT85)* are intended more as solvents than lubricants. They evaporate quickly.
- * WD-40, GT85 and similar spray type lubricants are highly effective as water displacers, but also work very well as solvents. They all contain a volatile solvent which helps the product to atomize as a spray, which then evaporates, leaving a very light film of product in place. GT85 does contain some teflon, which works well for protecting against gentle friction, but is not sufficient for nipples. Unfortunately, this means that these spray lubricants can very easily strip away effective lubricants that have been put in place at the factory. This is true for bicycle chains and for nipples. Sheldon's recommendation is to just use a simple drip-type dispenser and purpose-specific oil.
- On day 1, most riders take a moment to give their wheels a quick once-over visual inspection. There's always a risk that the wheel could suffer some abuse in shipping and not all wheels are purchased new.
Rims and Tires
- Tubular vs Clincher
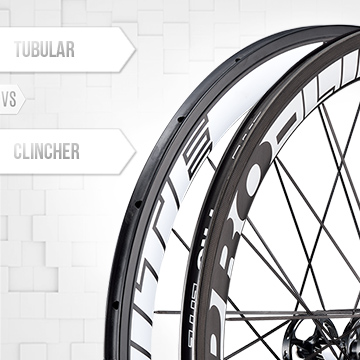 Both wheel types have pros and cons. Racers tend to prefer tubulars because the tires roll faster and the rims are also lighter, allowing easier acceleration for better race positioning off the start.
Because of the increased amount of preparation, tubulars are more commonly seen with racers, but they have several significant advantages that make them worth the effort.
- Tubed vs Tubeless
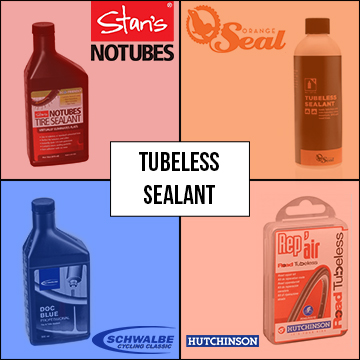 Tubeless tires have been in use with cars and motorcycles for decades now and are now commonplace in MTB use. Road wheels are now trending this way as well. Is it right for you?
The advantages are that you can get lower rolling resistance as there is less material to flex at the contact patch. For MTB, riders like the ability to use lower tire pressures, although this is not always desired for road use. Another advantage is puncture resistance, since tires are run with a small quantity of sealant, which allows for small punctures to be sealed very quickly, preventing the need for road-side tube replacement. Some riders - especially in the winter or who intend to ride on less-than-ideal terrain, such as is common with gravel or CX riding - get the best of both worlds by adding a bit of sealant to their conventional tube setup. For best results, use a tube with a removable valve core.
Disadvantages of tubeless are mostly in the more complicated installation. A "burst-type" pump or compressor is typically required in order to fill the tire and there is usually a week or so before the sealant stabilizes and the tire holds pressure well. Some riders worry about "burping", especially with lower pressures and wider rims, but in practical terms, this is comparatively uncommon.
- What does it mean if a wheel says "Tubeless Ready"?
-
"Tubeless Ready" refers to a rim shape on the inner rim bed which has been raised up to provide a surface which can guide the bead into place for easier inflation. It is worth noting that because of this, it can be more difficult to get a tire bead over the edge of the rim. This is because the tire bead typically sits in the indent on one side of the rim to allow more room.
It is still possible to set up a wheel as tubeless even without the "Tubeless Ready" moniker and it may even be easier in some cases. See the GCN video linked in the following question about Tubeless Installation.
-
"Tubeless Ready" refers to a rim shape on the inner rim bed which has been raised up to provide a surface which can guide the bead into place for easier inflation. It is worth noting that because of this, it can be more difficult to get a tire bead over the edge of the rim. This is because the tire bead typically sits in the indent on one side of the rim to allow more room.
- Tubeless Installation
 We have found that the best all-around guide for setting up a wheel with tubeless tires is the GCN video here.
As you can see in the video, people use almost any kind of tape, with many people preferring Gorilla Tape, which can easily be fine-tuned for width, as well as people who use specific widths from Stan's. Stan's rim tape is usually used at 2mm wider than the internal width of the rim, so a 19mm internal width would use a 21mm yellow tape from Stan's. Additionally, if a rim is "Tubeless Ready", there is no need for the thick rubber conversion strip made by Stan's. Conventional rim strips included with the wheel are not for tubeless setups.
Some additional tips include:- • If you're having trouble installing the tire, double-check that the bead is in the indent in the rim bed opposite where you are pushing it over the rim edge. A little bit of sealant along the rim edge can help the tire bead to slip over a bit easier without making it too difficult to handle.
- • Add a little sealant around the base of the valve stem, where it contacts the rim bed to prevent leaks around this hot spot.
- • You may also wish to apply a bit of sealant directly to the bead once the tire has been fitted. This will aid in getting a good seal and likely speed up the curing time as sealant is available at all potential points of leakage.
- • Use simple dish soap and water to create a "leak-finder" solution and use a spare bottle with a small hole in the cap to apply it where needed.
- Latex? Tubular and Tubeless
- The lure of latex tires includes some grand claims for lowering rolling resistance and lighter tube weights. However, there are some significant disadvantages as well. In fact, at least one brand has expressed dissatisfaction with latex tubes in general and goes as far as recommending that they are not used at all.
"...the way in which the latex tubes are sealed together and joined at the seams can be very inconsistent. With such variability in a tube - often we see wide ranges of variability in latex tube durability. This variability can be examined by simply pumping up a latex tube outside of a tire. The latex tube inflates with varying degrees of pressure throughout the tube (bubbling on some parts, while retaining the "tube" shape in others).” - Enve
While we stop short of saying that they are not recommended for use with Pro-Lite wheels, this is definitely a case of buyer beware. In the past, we have also experienced similar issues with latex tires exhibiting a "bump" at the seam and inconsistency in the quality, even within the same brand and model. We have not done extensive cross-brand testing with latex tires and tubes, so your results may vary. If you do wish to try out some latex tubes or tires, be aware that the results may not match the marketing claims.
In addition to the uncertainty associated with consistent quality, latex is a more porous material and does lose pressure over time. Those who ride daily will need to top up tire pressure before every ride.
Many riders do not feel the benefits outweigh the disadvantages for latex.
- The lure of latex tires includes some grand claims for lowering rolling resistance and lighter tube weights. However, there are some significant disadvantages as well. In fact, at least one brand has expressed dissatisfaction with latex tubes in general and goes as far as recommending that they are not used at all.
- 23c/25c/28c/32c?
- Is wider better?
Wider contact patches are quickly becoming an essential part of road cycling. The basic principle falls under the physics concept of deformation. The more deformation a substance experiences, the more energy is lost to that deformation. Given a specific air pressure, a set weight will displace a certain volume of air, causing the tire to deform. As the air pressure increases and decreases, the amount of deformation decreases or increases accordingly.
Tire pressure is generally tuned to the smoothness of the terrain. For road surfaces, most people run between 85 and 110psi according to their weight. Once the pressure has been chosen, is it possible to make the tire roll more efficiently?
The most efficient shape is a circle. This is illustrated by the physics you can see when you see a bubble. The smallest amount of deformation is spherical or circular.
By making the contact patch more circular, the deformation of the tire is reduced, without changing the volume of displacement. This allows the lowest rolling resistance possible.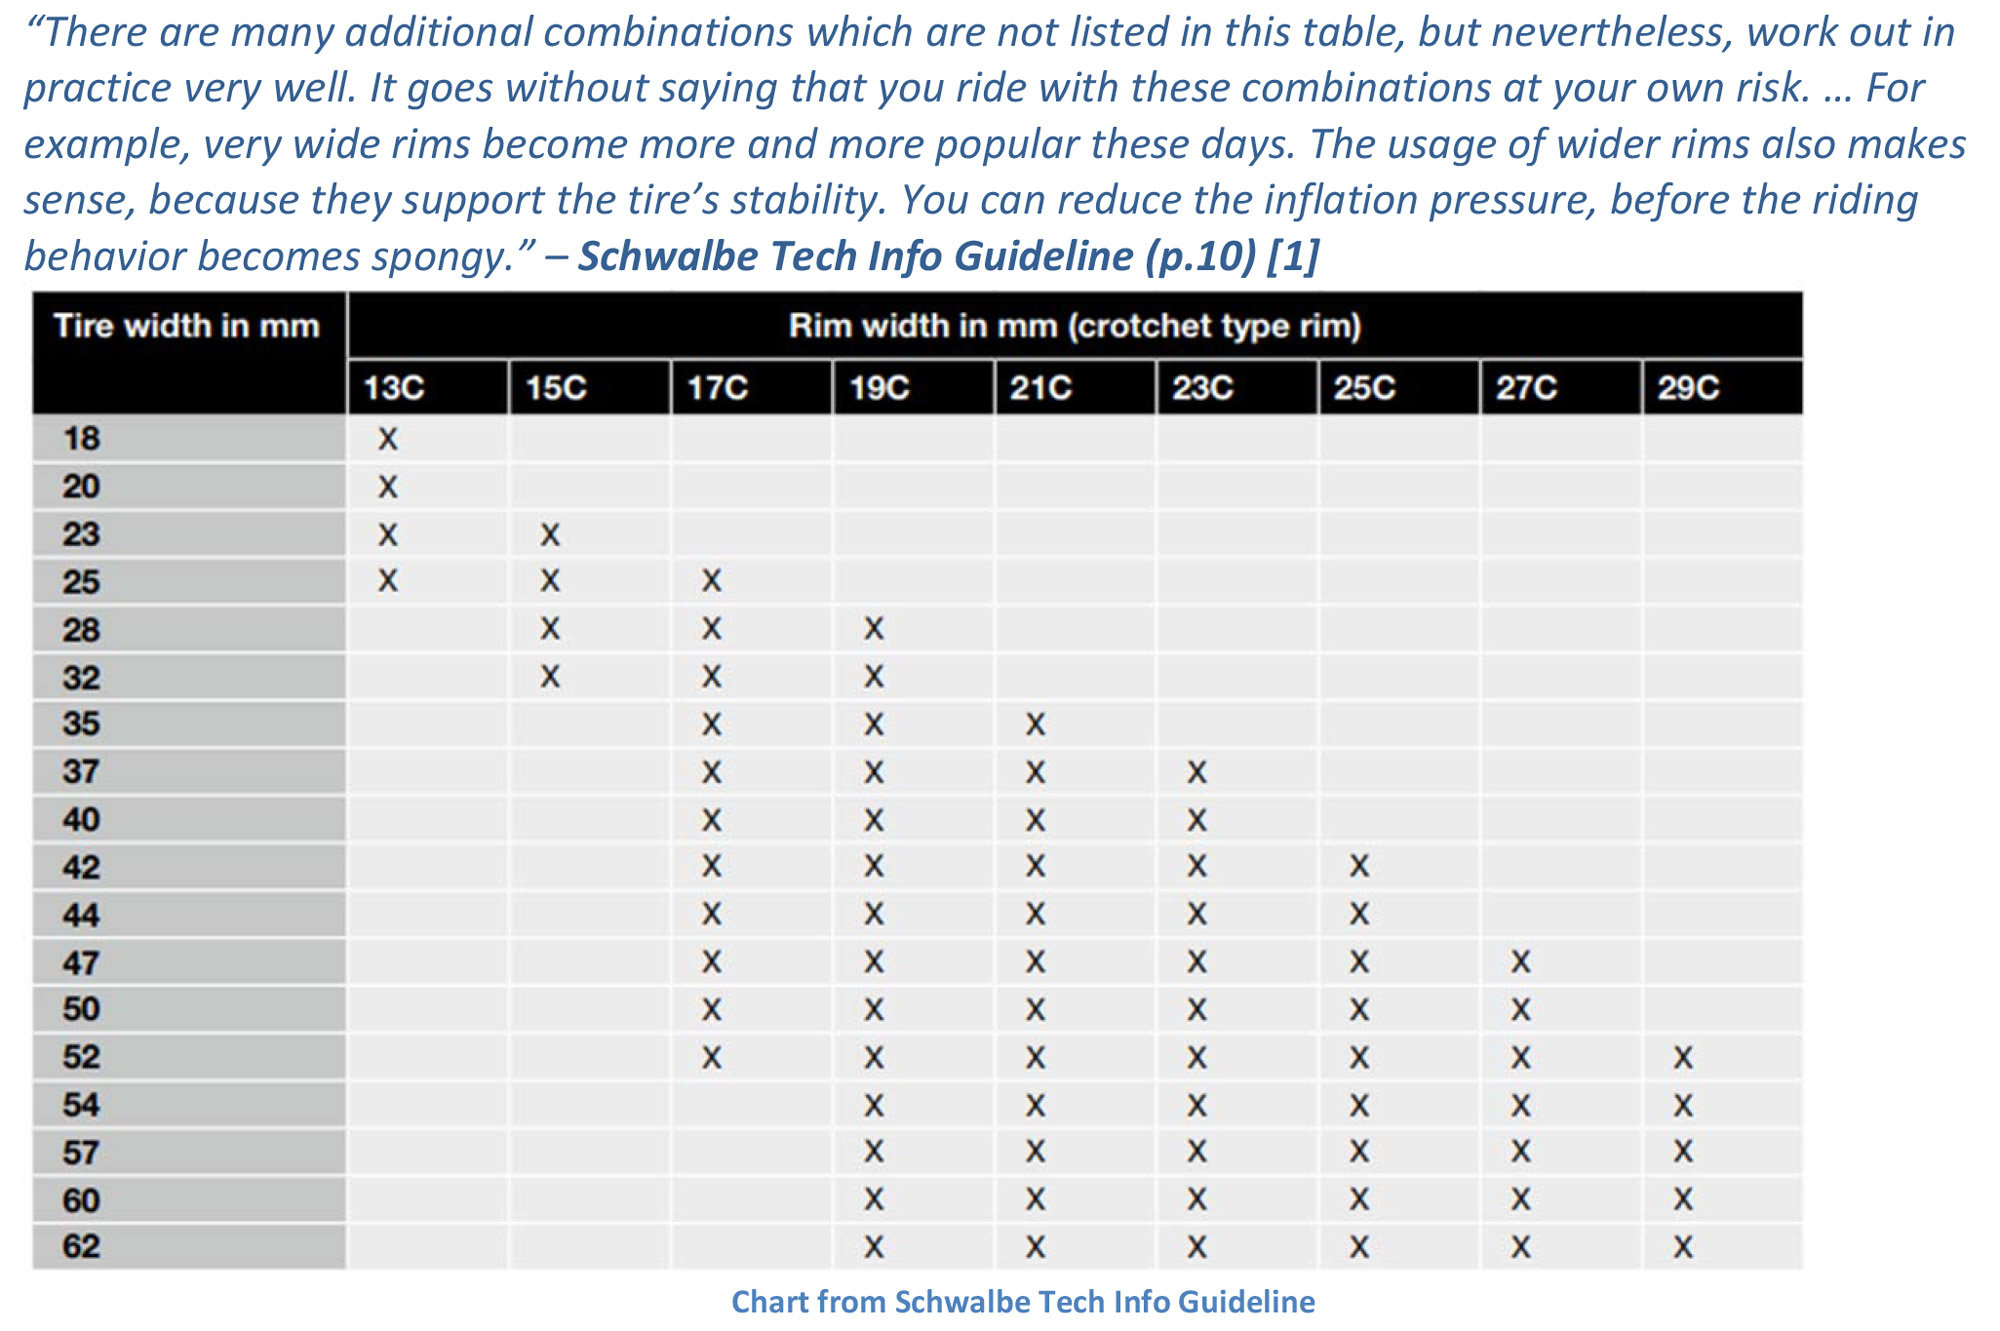 How wide can I go?
Generally speaking, the limit on width is not with the wheel, but with the frame. Some frames will have issues with the tire rubbing against the sides of the stays. Others will not take the height of the tire and it will rub against the seat tube. However, if the frame can accommodate the larger tire, there should be no other obstacles. Since we are not a tire manufacturer, we don't make specific limitations or recommendations for tire width. We leave that to the tire manufacturers. Even with these suggestions, there is still room for experimentation. They aren't hard and fast rules.
What about roll-off?
In most cases, this is not an issue. The risk of a tire rolling off the bead is much greater with very large tires and very low tire pressures. Even still, it is fairly rare to see this occur even with MTB wheels running tubeless. For a road, triathlon or track setup, running much narrower tires and higher pressures, it should be extremely resistant to roll-off. Some tire brands do not fit as well into the bead as others, which has been a known issue in the industry for decades. Since the advent of the ETRTO sizing system, this has been reduced significantly and most brands are fairly close to industry standards, hence the risk of roll-off is minimal.
"This scenario prevailed throughout the '70's and '80's. The situation got so out-of-hand that cooler heads have prevailed, and there is a strong (but not universal) trend toward accurate width measurements." - Sheldon Brown
Because of this, it is not appropriate for us to make claims about the quality and standards of the tires you may have on your bike, so we cannot state categorically that any specific tire size is acceptable a specific wheel, but almost all combinations have been tried and so far, we haven't had any complaints or a description of any problems. We invite you to drop us an email if you do experience roll-off or even burping with a specific tire/wheel combination.
Currently, among our rider base, the most common tire size used for conventional width rims is 23c, but a good number are using 25c too. Many riders in the UK are also using 23c and 25c on wide rim wheels like the Bortola A21W and Revo A21W. Some are even using 28c too.
What about the bulb effect?
There have recently been some questions about this. The idea here being that a wider tire on a narrow rim will create side surface drag and have a significant effect on the aerodynamics of the wheel.
We have not seen any evidence to support this. Aerodynamics is primarily concerned with frontal profile and Reynolds number (ie the viscosity of the medium which the wheel is passing through). Increasing the frontal profile by 1-2mm will increase aerodynamic resistance - but the effect will be extremely minor - likely well below the threshold of any known testing method. The role of side surface turbulence as a result of increasing the tire width by 1-2mm, while keeping the rim width the same is even smaller. As a general rule of thumb, wider is slightly less aerodynamic than narrow and at speeds over 35~40kph, aerodynamic benefits will likely outweigh benefits of rolling resistance. At slower speeds, rolling resistance improvements may outweigh aerodynamic benefits. You may wish to try it yourself and see what works best for you.
While most of these are extremely minor benefits, one more noticeable benefit of using a wider tire is comfort. A wider tire will provide a more comfortable ride. As with the vibration damping benefits of carbon fiber, this improvement can impact your endurance on longer rides, leading to not only faster times, but also more enjoyable rides.
Feel free to let us know what tire combinations are working for you on our FB page.
- Is wider better?
- Rim Brakes vs Disc
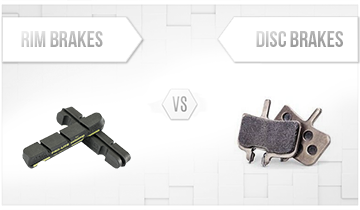 Disc brakes have something of a rocky history with road bikes. While they are the accepted standard for MTB bikes and arguably for CX, there are compelling reasons to stick with conventional rim brakes. The simplest of these is that rim brakes apply braking force to the rim, which is then transferred directly to the tire where it meets the ground. The braking is applied directly against the frame at the top of the fork, where flexion is minimal.
Contrast that with disc brakes, which apply braking forces against the fork leg base, where the forces are multiplied for potential flexion, then through the rotor and hub assembly into the spokes, then to the rim, where it is transferred to the tire at the ground. This creates several places for flex and significantly increases the force loading on the spokes. For some riders, this can increase the likelihood of spokes breaking (or just reduce the life of the spokes in general) and some may feel that the brake responsiveness is lower overall.
Where MTB wheels are overbuilt and easily able to handle these increased forces, road wheels are typically built to be as light as possible and are more susceptible to spoke breakage and flex. This is mitigated by using more robust spoke lacing, but making wheels stronger also means making them heavier. As disc brakes become more popular, larger axles are becoming more widespread as well - which isn't necessarily a bad thing.
One advantage to disc brakes though is that potential issues with heat buildup in carbon rims are avoided altogether, however there are few carbon road wheels with rims made to take advantage of that currently.
Ultimately, you will have to choose if you prefer a heavier wheel with disc brakes or a lighter wheel with conventional braking, but many riders still find the classic setup of an alloy rim with rim brakes to work best.
- Brake Installation
- Probably the first thing to note with brakes is whether you have the correct pads or not. For Pro-Lite carbon wheels, we are currently providing SwissStop brake pads (grey with yellow Pro-Lite lettering) with new wheels. We spent considerable time developing a specific formulation with the best combination of lowered heat build-up, braking efficiency and longevity. Previously, our brake pads were blue, but our carbon has been using a new resin type recently, so if your wheel came with grey SwissStop pads, the blue pads are not recommended. If you have a pair of wheels that came with blue brake pads, you can continue to use them. Or you can upgrade to the SwissStop type.
You can purchase replacement SwissStop pads here.
For alloy rims, you may use any brake pads that you prefer. We offer an all-season 3-element brake pad for alloy braking surfaces here.
- Probably the first thing to note with brakes is whether you have the correct pads or not. For Pro-Lite carbon wheels, we are currently providing SwissStop brake pads (grey with yellow Pro-Lite lettering) with new wheels. We spent considerable time developing a specific formulation with the best combination of lowered heat build-up, braking efficiency and longevity. Previously, our brake pads were blue, but our carbon has been using a new resin type recently, so if your wheel came with grey SwissStop pads, the blue pads are not recommended. If you have a pair of wheels that came with blue brake pads, you can continue to use them. Or you can upgrade to the SwissStop type.
Spokes and Nipples
- Oh snap! A spoke snapped – now what?
- As wheels are built lighter and lighter, and riders get stronger, the chance of having a spoke break inevitably increases. For this reason, many racers have the habit of keeping a spare spoke or two inside the seat post or discreetly tied to a chain stay.
The general rule of thumb that is applied across the industry by many wheel builders is "three strikes, you're out". This means that after a single break, there's no need to worry, just replace a spoke, Same for a second spoke. If you encounter a third break, this indicates fatigue and it's probably worth it to do a full rebuild.
With this in mind, we include three additional spokes of each length in the spoke kits that we sell on our web store. This should cover your needs for quite some time and for almost any eventuality.
You can find our spoke kits here.
There's a lot you can tell from the location of the break.- • If the nipple breaks, it could be excessive tension. It the nipple has cracked, or shows signs of corrosion, check other spokes for galvanic corrosion. It's unlikely, but worth checking.
- • If the spoke itself breaks near the nipple, this is likely general fatigue.
- • If the spoke breaks near the hub, this is usually an indication of insufficient spoke tension. Check the whole wheel to make sure the spokes are tensioned high enough. Also take a moment to look for tell-tale signs of galvanic corrosion, ie white powdery deposits on the spokes near the nipples.
- • If the wheel has disc brakes, it is less unusual for a break near the hub, but braking forces will make it more likely for a break to occur closer to the hub and this might not indicate that tension is too low.
- As wheels are built lighter and lighter, and riders get stronger, the chance of having a spoke break inevitably increases. For this reason, many racers have the habit of keeping a spare spoke or two inside the seat post or discreetly tied to a chain stay.
- Straight-Pull vs J-Bend
 Is one of these better than the other?
Short answer - yes.
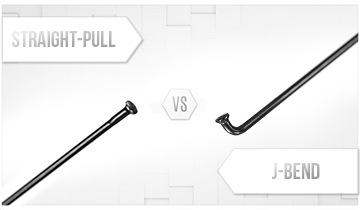
Straight-pull spokes carry several advantages. For starters, they have no bend, so there's less flexing while riding and there's less chance that you will need to re-true the wheel over time. When you have less flexing, the wheel itself is more efficient. We call that "Power Transfer". It is probably the most important aspect of a wheel and is one of the reasons that many riders remark that Pro-Lite wheels "feel fast" when ridden. In short, power from your pedaling is converted into forward momentum. Straight-pull spokes offer excellent power transfer.
What are the disadvantages though?
Straight-Pull spokes don't have a lot of disadvantages. It can be a bit harder to replace spokes on some wheels using straight-pull spokes, but we design our wheels so this isn't an issue and you can easily replace a spoke on a PL wheel with J-Bend or straight-pull spokes.
Another advantage for spokes can be tangent lacing. On the Gavia, special J-Bend spokes are used which allow the wheel to be built using tangent lacing. This is widely known as the most power-efficient lacing type, delivering unmatched Power Transfer. Straight-Pull spokes are often built to use raised flanges on the hub, at or near tangent, resulting in an efficient wheel.
- Spoke Tension: Measuring Tools
- It's easy to think of spoke tension as the tightness in the spoke, introduced by the tightening of the nipple with the spoke in place, but some people get confused about how that relates to the spoke tension meter.
There are several different types of spoke tension meters in the market. DT Swiss, Park and others. They all operate around the same basic principle though. They measure the deflection by setting the tool at the thickness of the spoke, then measuring the remaining discrepancy, then comparing that to previously calculated deflection tables based on known control samples at the factory. This can be a bit tricky to figure out on your own, especially if you don't have a calibrating tool. The solution is actually very simple.
Each manufacturer will provide a conversion table. They will cover the most common spoke sizes. If you have a spoke tension meter, but you do not have the tension chart, contact the manufacturer of the tension meter for accurate information.
Our spoke tension chart can be found on each wheel's product page and uses DT Swiss as the basic reference value since we use DT Swiss spoke tension meters in our factories, calibrated twice daily.
- It's easy to think of spoke tension as the tightness in the spoke, introduced by the tightening of the nipple with the spoke in place, but some people get confused about how that relates to the spoke tension meter.
- Galvanic Corrosion
- Corrosion? Does aluminum rust?
Not exactly. Rust occurs when iron reacts with oxygen to become the reddish, crumbly substance we are familiar with. Aluminum can still react though, in a slightly different way.
Galvanic Corrosion is an electrochemical reaction which can only occur when there are several specific conditions: direct electrical contact, moisture and an electrolyte (ie salt or sugar). Salt and sugar can come from stray sweat, sports drink, salt spray from the ocean or salted roads. If the conditions are right, the reaction can happen quite quickly, a matter of days or even hours.
If you would like to read more about Galvanic Corrosion, you can find more information on Wikipedia.
Galvanic Corrosion is most commonly associated with coastal areas and areas with cold winters. Bridges and watercraft are most susceptible to this problem, but it can also occur in bicycle wheels where aluminum touches steel. Fortunately, it's extremely rare, showing up probably less than 1 in 1000 wheels, and better yet, it's also quite preventable.
The best way to prevent galvanic corrosion is to prevent the wheel from drying out or having the oil washed out from the nipples. This is most easily done by adding a drop of oil every few months or after a wet ride or washing the bike. Basically, any time you might see a need to re-lube the chain, you can add a bit of oil to the nipples of the wheel. It only takes a moment and it can also prevent the nipples from seizing and getting rounding off during truing or spoke replacement.
Please note that we do not recommend using spray lubricants for this purpose since they contain a volatile solvent which is designed to flash off and are usually designed for penetration and cleaning (ie WD-40 and GT85). Unfortunately, they can also break down the oil that was applied at the factory. Sheldon Brown's recommendation is just to use a purpose-specific oil in a drip-type dispenser. Simple works best.
Some riders feel that this is not practical or if the problem is widespread, they may choose to change over to brass nipples. There is a good chance that this will prevent corrosion from happening later on. The spokes might not be damaged, but if there are white deposits, those will need to be cleaned off before rebuilding.
When purchasing a spoke kit from our web store, brass nipples can be requested instead of alloy nipples at no additional charge.
- Corrosion? Does aluminum rust?
- Spoke Replacement: Sapim and other brands
- Pro-Lite spokes don't break very often, but given that it does occasionally happen, what kind of spokes should be used?
While most generic brands can be used in a pinch, we always recommend that Pro-Lite spokes are used for replacements.
Because we also have the commonly-held view of "three strikes, you're out", where a rebuild is recommended only after 3 spokes have broken, we include 3 spokes of each length with each spoke kit purchased on our web store.
Recently, Sapim spokes have been more common at bike shops as their "go-to" spoke for general use. Sapim makes excellent spokes, which have a reputation for being very durable and not easily broken. This is because they are more elastic, so when they encounter impact, they stretch, rather than snap.
However, this also means that there is more flex in a wheel built using Sapim spokes - and this is directly opposite to the way Pro-Lite spokes are designed. Pro-Lite values power transfer as the most important value of a wheel, with elasticity working directly against this by causing more flex. Pro-Lite spokes are generally a little less elastic, although still very strong.
Many riders have noticed this difference when they ride the wheels and comment that they "feel fast". Power transfer is critical to a high performance wheel.
The most important thing to understand is that while both are valid approaches to wheel-building, there are problems that occur when a highly elastic spoke is mixed with low elasticity spokes. This resembles the principle of the old adage "don't use a new patch on an old cloth". The more elastic spoke will lead to load spiking in other parts of the wheel, often leading to another break very soon afterwards. If this is not remedied quickly, it can even lead to premature fatigue, potentially requiring a full rebuild.
According to your preference, Sapim spokes may indeed be used to rebuild the whole wheel, but Sapim spokes should not be used as single spoke replacements when the other spokes are Pro-Lite, just as Pro-Lite spokes should not be used as single spoke replacements when the other spokes are Sapim.
- Pro-Lite spokes don't break very often, but given that it does occasionally happen, what kind of spokes should be used?
- Spoke Replacement: Best practices and tips
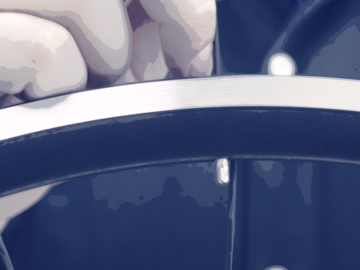
- • Oil the nipples periodically. The rule of thumb is to add a drop of oil to the nipples when oiling the chain, ie at the change of seasons, after a wet ride or after washing the bike. There are multiple benefits from this and it only takes a moment.
- • Use only Pro-Lite spokes for single replacements. Don't mix-n-match.
- • When replacing a spoke, de-tension the other spokes a half or full turn, then bring the whole wheel back up to tension, starting with the new spoke, then working diametrically opposite and continuing around the wheel in a similar, alternating fashion.
- • After the wheel is brought back up to tension and re-trued, place the wheel against a solid surface and apply some side pressure to de-stress or "bed in" the wheel. Re-true again.
- • After a few rides, check the wheel and re-true if necessary.
- Do I need to re-true after a few rides?
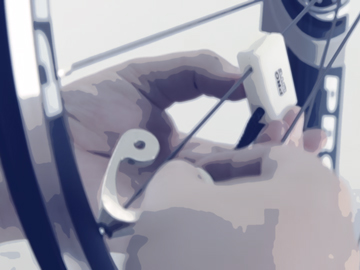 For most brands, the answer is usually yes, but for Pro-Lite, this is generally not required.
The reason that wheels need to be re-trued after a few rides is that spokes tend to relax a bit, typically at the J-bend. Experienced builders take steps to "bed in" the wheel. At Pro-Lite's wheel building facilities, we have a press just for this purpose at each truing station and it is used multiple times (minimum of 6 times) per build on every single wheel that is laced up.
Having said that, it is still worth checking your wheel's trueness when you first set it up since there is always a possibility that the wheel has been stressed or knocked about during shipping, which can lead to truing issues. You will likely be pleasantly surprised that the wheel is still straight as an arrow.
Free Hub Bodies
- Terminology: Freehub, Freebody, Freewheel?
- The hub consists of the hub shell which remains static to the wheel and the free hub, which rotates relative to the wheel. We generally use the terms Freehub, or Freebody or even free hub body and we do use them somewhat interchangeably. They each refer to a separate body which rotates within the hub shell. The vast majority of the wheels we make use this method.
There is a difference between the free hub body and the freewheel. In the case of the freewheel, it is threaded into the hub shell and contains the ratcheting system within its own body. It has a part which remainst static to the wheel and a part which rotates. It is plausible to call it a "free body" as a "freewheel body", which is convenient for the naming of parts. There is only one wheel within the Pro-Lite range that uses a freewheel, the Garda.
There are two types of freewheel, internally threaded (inside the hub) or externally threaded (on the outside of the hub). The Garda is internally threaded, with a 12mm hex tool fitting.
Since the items look fairly similar and have similar function, these terms can be used interchangeably without excessive confusion.
- The hub consists of the hub shell which remains static to the wheel and the free hub, which rotates relative to the wheel. We generally use the terms Freehub, or Freebody or even free hub body and we do use them somewhat interchangeably. They each refer to a separate body which rotates within the hub shell. The vast majority of the wheels we make use this method.
- Campy vs Shimano - Can I switch?
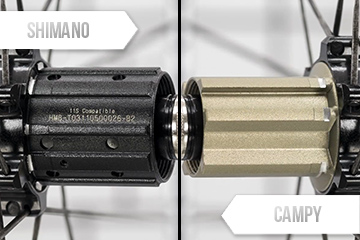 For most Pro-Lite wheels, the answer is yes. You can generally just order the new part and do the changeover. There are some models which have a special procedure, for example, the Bortola and the original Gavia V1, which need to have a small silver washer moved from one side to the other.
Only the Como cannot be changed from Campy to Shimano. The Garda does not have a Campy version.
- Free Body Installation Notes
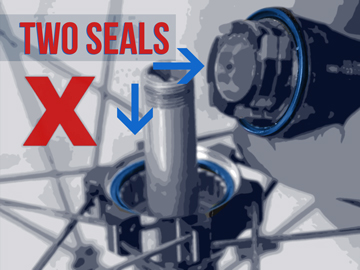 For the most part, Pro-Lite freebodies can be changed with a couple of simple tools. Usually a 5mm and a 10mm Allen key, with a few using a 6mm or a 17mm narrow wrench.
When changing a freebody from Shimano to Campy or vice-versa, some models have a special washer that needs to be moved from one side to the other (Gavia V1, Bortola), but most are very straightforward.
If you are not changing systems, the procedure is even simpler. However, you will want to make note of the axle collar inside the freebody and possibly the number of pawls on the freebody. Some freebody models have changed from 3-pawl to 4-pawl. This won't cause any problems for compatibility, but it will increase the number of engagement points. Additionally, the axle collar for the 4-pawl will not be the same dimensions as the axle collar for the 3-pawl. An axle collar will be provided with all freebodies that use one.
Additionally, there is a brand new rubber seal included with the freebody. You will want to make sure that the old seal is removed before installing the new one. Make sure that the lip on the seal mates to the groove on the freebody.
A brand new 8/9/10S type spacer is also included with every Shimano/SRAM type freebody for full backwards compatibility.
- Cassette Installation Notes
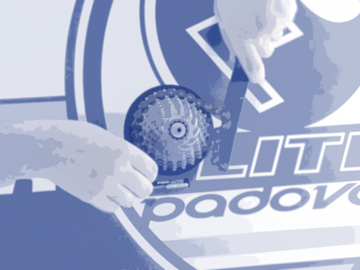 Installing or changing a cassette is fairly straightforward, especially if you have all of the cogs in the correct order. You will need a few basic tools:
- • Chain whip
- • Lock ring tool (Shimano or Campy specific)
- • Adjustable wrench or other hex tool
- • Torque Wrench
The Basic Steps: Removal- • Brace the cassette with the chain whip.
- - Use the larger rings to prevent damage or slipping via a longer moment arm.
- • Undo the lock ring.
- • Try to keep the cassette together to save time.
- - Keep an old freebody around for a place to store a cassette during cleaning or maintenance.
The Basic Steps: Re-Assembly- • If you do require using an 8/9/10S spacer, it should go on before the cassette.
- • The small spline is the reference point on the freebody, keep it at the top for convenience.
- - Spacers (between the cogs or the 8/9/10S spacer) do not need to align to the small spline.
- - Cogs do need to align to the small spline because most cassettes feature ramping to aid shifting.
- If you do need to re-sort your cassette:
- - Cogs and spacers should go on alternately.
- - The last three cogs have a spacer built in, but you shouldn't have any spacers left over.
- - The last cog will extend beyond the end of the freebody, however not so far that the lock ring cannot reach the thread.
- • Because the freebody is aluminum, but the lock ring is alloy, it is very important to not cross-thread, so be sure that you have found the thread with the lock ring before applying heavy torque.
- • The end cap will have the torque listed and it is usually advised to tighten closer to the higher value.
- • The cassette needs to be tight to prevent individual cog slippage, leading to bite.
- 8, 9, 10, 11 Speed? (Shimano)
 What can I use?
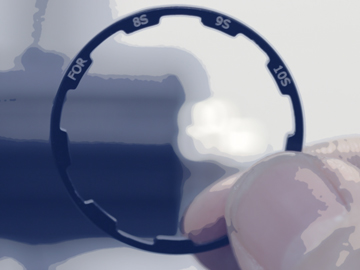
Chances are that you can use any and all of these. Around 2013~2014, we started producing exclusively freebodies that are compatible with 11S. Since then, all wheels and freebodies have generally been 11S type with a spacer to allow 8, 9 or 10 Speed.
There is very little difference between the different types, with 11S being 1.85mm wider than 10S. While some brands charge well over a hundred US dollars for upgrading, for PL wheels, it is a relatively simple procedure and can be accomplished with a simple freebody swap, even on most of our older wheels.
You can purchase freebodies at the vendor where you purchased your wheel or on our web store.
When using a Pro-Lite wheel with an 11S freebody, you should not use the spacer. If you are using 8, 9 or 10S, please use the spacer.
Exceptions and Special Notes:- • MTB: MTB 11S cassettes were a little earlier to market than 11S road. Because of this, they follow a different rule. The cassette was designed with a little overhang, placing the additional ring closer to the spokes, but not taking up more room on the freebody. An MTB 11S cassette will need the spacer for 8/9/10S. This can be important for some CX riders using a road type hub and an MTB cassette.
- • Dish: Because the difference is quite small, the adjustment to 11S freebodies was accomplished by modifying the freebody design. It does not affect the dish of the wheel and no spoke adjustments are required to make it fit.
- • Shimano 10S Only Type: For a short time, Shimano was producing a special type of cassette with high-rise splines, similar to Campagnolo's design. Because this was a radical departure from the normal design for Shimano, it was only compatible with that generation of cassettes. While we did have some of these for testing purposes, they were not produced in large quantity and the market was relatively uninterested in Shimano's new standard, which died out fairly quickly. It is extremely unlikely that you will encounter a wheel with this type of freebody. All of our Shimano type wheels have been sold with conventional Shimano/SRAM type freebodies.
- • SRAM: For conventional freebodies and cassettes, SRAM has chosen to base their designs on Shimano standards. Unless you have an MTB XX1 type freebody, SRAM cassettes are compatible with Shimano in the same speeds and follow the same rules as above. Certain MTB models do have XX1 type freebodies available.You can purchase XX1 type freebodies on our web store.
- • Campag: The above notes are for Shimano only. Campagnolo made their big change in standards in between 8S and 9S. For Campagnolo freebodies and cassettes, 9/10/11S are all the same for splines and width and therefore fully cross-compatible. Campag 8S has a different spline arrangement and is not compatible with Campag 9/10/11S.
Axles
- Oh snap! My axle is broken?
 This is a pretty rare problem, but it does occur. The most common situation to see this is with 2-in-1 track wheels, like the Vicenza or Padova, which are often swapped between riders and bikes, at times fairly quickly. This can lead to over-tightening of the axle, which when combined with the very strong forces of a track rider as well as heavy loading all coming froming one direction can easily lead to a snap.
Aluminum is very strong in tension, but is significantly weaker in compression, so over-tightening can easily lead to failure.
It is also possible to mis-thread when rushing a wheel swap between events, so this is another way the axle can be damaged.
Fortunately, you can purchase axles on our web store.
If you need the entire 2-in-1 axle kit, you can find that here. (Note that the axle collar currently depicted is not actually included anymore.)
- 2-in-1: Road and Track
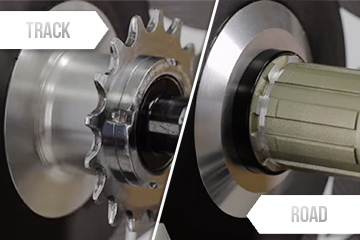 The Vicenza and Padova wheels can both be swapped very quickly and easily from Road to Track.
The basic instructions are:- • Use a pair of 5mm allen keys to remove the end cap.
- • Remove the freebody and axle together.
- • Ensure that the axle collar remains with the freebody and replace the end cap on the end of the axle to keep everything together. Store in a sealed plastic bag.
- • Insert the track axle and silver end caps. Take note of the order they are assembled in the kit as you received them.
- • Tighten the outer wheel nut against the inner nut up to a maximum of 14 N.m
- • When the axle is in place, fit the reverse-threaded track cog and lock ring.
- • Done.
If you need the entire 2-in-1 axle kit, you can find that here. (Note that the axle collar currently depicted is not actually included anymore.)
- Axle widths – Track vs Road
- There are always exceptions to the most common standards, but here are the sizing standards which apply to the vast majority of wheels out there:
- • The front wheel has the same width - 110mm for both road and track.
- • The rear wheel is 120mm for track.
- • The rear wheel is 130mm for road.
- There are always exceptions to the most common standards, but here are the sizing standards which apply to the vast majority of wheels out there:
- Axles Big and Small: 135 vs 142
- Most of our MTB wheels have been sold with conversion kits included in the box. The axle and the end cap are different for the 142mm axle. Both are for the 12mm axle standard.
Similarly, the front hub will also likely include the parts to allow QR and 15mm and possibly 20mm (for AM models).
- Most of our MTB wheels have been sold with conversion kits included in the box. The axle and the end cap are different for the 142mm axle. Both are for the 12mm axle standard.
- Axles: MTB vs CX
- We don't get a lot of questions about this, but some have wondered if they can use an MTB wheel for CX on a road bike or a road wheel on an MTB frame. Our recommendation is to use the correct tool for the job. There is a difference in widths between the frame dropouts of a road frame vs an MTB frame. If you have a frame that has 135mm width dropouts, we do not recommend using a road wheel. Similarly, if you have a frame with 130mm width dropouts, we do not recommend using a 135mm wheel. You might be able to make it fit, but it may void your warranty.
- Tandems?
- There are always exceptions to the most common standards - and Tandems certainly have a lot of different standards compared to conventional road bikes. Many tandems are custom built, so your results may vary. Your frame and fork might use conventional track widths, conventional road widths or even some of the more common sizes used for tandems, including 145mm and 160mm.
If you have track-widths, you may be considering the Rome and Padova as excellent choices for your Tandem track bike.
- There are always exceptions to the most common standards - and Tandems certainly have a lot of different standards compared to conventional road bikes. Many tandems are custom built, so your results may vary. Your frame and fork might use conventional track widths, conventional road widths or even some of the more common sizes used for tandems, including 145mm and 160mm.
- Revo: Squeaky Axle?
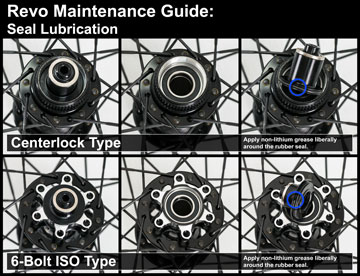 The Revo does occasionally get used in cyclo cross settings, so we've used some slightly heavier seals in the form of a rubber gasket. It is possible for this to squeak a bit on some wheelsets, so if this is an issue for you, you can either add a drop of light oil (especially for dry road use), or a bit of waterproof, non-lithium grease (for wet use).
Bearings
- Oh snap! My bearings are toast.
 Bearings are the heart of the wheelset and do occasionally need to be replaced.
There are two primary types of bearings: cup and cone and cartridge type bearings. Consensus is divided on which is the better method and there are strong arguments for each.
Cup and cone bearings require a bit more work to maintain and set up with tension adjustment and fine tuning, but they tend to last a long time, with very cheap replacement parts. However, in most cases, the cup cannot be replaced, which makes it necessary to replace the entire hub when the bearing has reached end-of-life.
The Como uses cup and cone bearings. All other wheels use cartridge type bearings in the hub shell.
Cartridge bearings also have specific tools and know-how to replace, but the replacement can be handled quickly and cleanly. Once the bearings are set up, the wheel can simply be re-assembled and ridden. Cartridge bearings won't last as long as a cup and cone bearing, but the entire bearing can be replaced, thus making the longevity of the hub virtually indefinite.
If you would like to read more about how bearing codes work, this page has some good information.
- Bearings: 2 bearing? 4 bearing? 5 bearing?
- All hubs operate on two bearings. In the front wheel - the simplest hub type, the wheel sits on two bearings on each side of the hub. For the rear wheel, there are two elements. The axle runs through the hub shell and supports the wheel on two bearings. Additionally, the freebody rests on two bearings. For convenience, the freebody is easily replaced, along with the bearings.
Two bearings in the hub shelle plus two bearings in the freebody makes 4 bearings in the rear hub. So what is the 5-bearing hub?
The two hub-shell bearings are intended to center around the gravitational center of the the wheel, with different sized bearings used where the gravitational center is biased closer to the drive-side hub shell bearing. In the freebody, the bearings are intended to center at the center of the cassette, with the edges of the bearing lining up at the edges of the cassette spline area to meet the forces applied from pedaling.
Where the freebody meets the hub shell, there is an additional point of flexion which is supported in most cases by a bushing (also called an axle collar). In the case of the Bracciano A27 5-bearing hub, a roller bearing is used instead of a bushing. This helps support the axle. There is a polished surface on the axle in this hub to allow the rollers a point of contact. However, this method requires a hard steel axle. Modern designs have eschewed steel axles in favor of lighter, larger diameter hollow alloy axles. Starting in 2018, the Bracciano A27 will be changing over to the same 4-bearing hub as the other Bracciano models. This will be the case for models with dark grey rims.
The two bearings in the hub shell are the ones which get replaced. These bearings are usually International Standard bearings using standard bearing codes. Given that bearings are very small items and usually fairly inexpensive, international shipping costs can easily be well in excess of the cost of the bearings. You may wish to source these locally.
You can find the number codes for the bearings or purchase them directly on this page on our web store.
Our bearings are generally Japanese EZO brand. We have found their quality to be consistently high and they have a good reputation throughout the industry.
Since late 2017, EZO made a change and started using green seals for 2RU seal types for quick and easy identification. There is no other quality difference, this is simply for visual stock organization at the factory.
- All hubs operate on two bearings. In the front wheel - the simplest hub type, the wheel sits on two bearings on each side of the hub. For the rear wheel, there are two elements. The axle runs through the hub shell and supports the wheel on two bearings. Additionally, the freebody rests on two bearings. For convenience, the freebody is easily replaced, along with the bearings.
- Bearings: Local vs Online
- Most cities have at least one or two bearing supply vendors. Each bearing vendor has a choice as to which brand of bearings they carry. Some have a variety of quality levels, but you can generally find a decent quality bearing for a reasonable cost. Most bicycle shops tend to sell bearings with a substantial markup, and it's not unusual to find low quality bearings for the same price as high quality name-brand bearings such as those we use from the Japanese bearing manufacturer EZO.
- Bearings: Ceramic?
- This is probably the most visible question when discussing bearing quality. Ceramic bearings are widely viewed as the gold standard for bearing quality, however many well-respected names feel that the issue is overstated. Bicycle Guru Sheldon Brown described ceramic bearings as overprived and impractical:
"These are a silly gimmick, aimed at gullible cyclists with too much money. They have no real benefit in practical use on bicycles.
'A fool and his money are soon parted.'"
Most experienced mechanics realize that the primary reason that ceramic bearings are used by pro riders is to drive sales of highly profitable ceramic bearings and that the actual benefits are imagined. Because of the long moment arm of a bicycle wheel compared to the friction introduced by the bearing, there is almost no way to even detect the difference between each bearing. While some of the most biased sources have claimed benefits as great as between 4% and 0.5% improvement in rolling resistance, the real numbers are likely hundreds of times smaller than this and well below the normal variance threshold of any testing method. One ambitious testing report claimed an improvement of less than 0.75W at 500RPM (near-maximum racing speeds on flat surfaces with neutral wind conditions). Not only is this undetectable by a human rider, it is several times lower than the stated accuracy of even high quality consumer power meters (+-5% at 200W = 10W). Within the realm of steel bearings, seal types can make a significant difference in rolling resistance that is far in excess of the difference between steel and ceramic bearings.
The primary use benefit of ceramic bearings is for high speed applications, usually measured in tens of thousands or hundreds of thousands of RPMs, where the use of extremely light oils are required to prevent heat build-up, so ultra-hard, ultra-heat-tolerant bearing surfaces are critical. Most bicycle wheels operate at a few hundred RPM and significantly less than 1000 RPM even during fast descents.
Ceramic bearing proponents often talk about ball grades, with plenty of misinformation clouding their explanations.
Some clarified information for bearings:- • Ceramic material: Ceramic bearings made for cycling applications are all made from Si3N4. The common name for this is Silicon Nitride. If you see a company claim that Si3N4 bearings are better than ceramic, get ready to protect your wallet.
- • Most ceramic bearings have ceramic balls rolling on steel races. Ceramic bearings tend to wear out by wearing down the races. Steel bearings tend to wear down by wearing down the balls. In steel bearings, the balls are typically the same hardness as the races, so the balls wear slightly faster than the races because their wear is confined over a smaller total surface area than the race.
- • Balls used in the bearings are graded according to roundness. The grade is literal, defined as variance from roundness in millionths of an inch. The smaller the number, the rounder the ball. Grade 3 is roundness variance less than 3/1000000". Grade 5 is roundness variance less than 5/1000000". Therefore, Grade 3 is a higher quality than Grade 5. Balls are separated into grades by measuring their roundness by a filter, not by manufacturing at specific roundnesses. Grade 3 and Grade 5 balls will be made on the same batch, but Grade 3 balls pass a quality filter, while Grade 5 pass a lower quality filter, but not the Grade 3 filter.
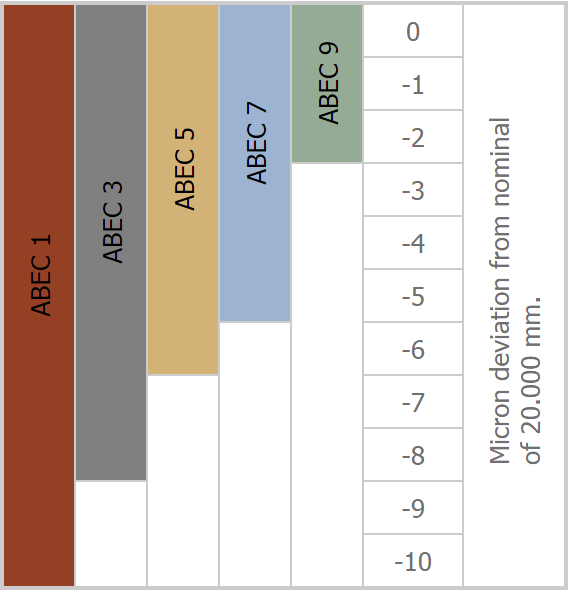
- • Bearing races are graded on a different scale, called ABEC. It was developed by the Annular Bearing Engineering Committee (ABEC) of the American Bearing Manufacturers Association (ABMA). Unlike the simple ball Grade, which is based on a single measurement, the ABEC scale is based on a variety of factors. ABEC grades use numbers in the opposite direction of ball grades. ABEC 7 is a higher quality than ABEC 5.
- • The most common ceramic bearing grades are Grade 3 balls on ABEC 5 or ABEC 7 races.
- • The highest demands on bearing quality among any industry are aerospace (especially in turbines) and scientific instrumentation. The highest quality of balls available to any industry is Grade 3. Contrary to some claims, no bearing manufacturer has ever sold Grade 2 balls. NASA uses Grade 3 balls on ABEC 7 (scientific instrumentation or propulsion) or ABEC 9 races (for extremely high RPM propulsion in sensitive areas). ABEC 5 and ABEC 7 are almost the same. For a 20mm bearing, ABEC 1 (the lowest grade considered acceptable by the ABMA) has a tolerance of 10 μm, ABEC 5 is 6 μm and ABEC 7 is 5 μm, where ABEC 9 is 2 μm.
- • The highest quality steel (non-ceramic) balls in the world are special steel balls made in Europe at Grade 6 and 7 and are not commercially practical. Grade 10 is the highest quality commercially available, but most cycling bearings are Grade 25, which is sufficient for many years of use. The lowest quality balls that can be easily purchased is Grade 200. With a reasonable quality grease, you can still get good performance and longevity from these bearings. However, it would require significant effort to find such low quality balls and the money saved for them is likely nil.
- • The thickness of the oil and grease in the bearing is a far greater indicator of rolling resistance and longevity. Even still, the difference is still virtually undetectable in actual riding. The only detectable difference is cost.
- This is probably the most visible question when discussing bearing quality. Ceramic bearings are widely viewed as the gold standard for bearing quality, however many well-respected names feel that the issue is overstated. Bicycle Guru Sheldon Brown described ceramic bearings as overprived and impractical:
- Bearings: Tuning a Loose Ball Bearing
- While we don't currently manufacture any wheels with Loose Ball (cup and cone) type bearings anymore, due to their longevity, there are still many people riding them.
The key factor with these wheels is that you want to keep the bearing pressure as low as possible while avoiding any play in the bearing. This is accomplished by adjusting the tension cone, then locking it, either with a grub screw or a lock nut, depending on the design of the wheel. Generally speaking, you should try to err on the side of less tension and resistance as low as possible, then mount the wheel on the bike. When the skewer is tightened, additional pressure will be placed on the hub, which will take up any play that might be present in the wheel when spun in the hand before being mounted.
The Gavia also has the ability to fine-tune this tension to achieve even lower rolling resistance than normally available for cartridge bearing type wheels.
- While we don't currently manufacture any wheels with Loose Ball (cup and cone) type bearings anymore, due to their longevity, there are still many people riding them.
- Bearing Replacement: Freebody bearings?
 Can you replace the freebody bearings? Should you?
In most cases, this is not practical. The freebody bearings lie along the same shaft, separated by a spacer. This means that replacing the bearings will likely require a special long-travel bearing press. Removing the innermost bearing is quite difficult and can easily damage the freebody internal surface. Replacing the bearing will have the same difficulty. Additionally, achieving correct spacing without purpose-specific shims can also be challenging.
The cost of the freebody as a complete unit is generally quite modest and it almost always makes sense to simply replace the freebody, which is an extremely easy job on Pro-Lite wheels. For most of our wheels, the entire job can be done in a minute or two with very basic tools such as 5mm allen keys and in some cases a 17mm wrench or 10mm allen key.
- Bearing Replacement: How to...
- There are many different methods used for replacing bearings. At the factory, hydraulic presses are the standard way of operating. The official way to replacing a bearing involves a screw type bearing puller and a threaded bearing press.
More pragmatic methods include using the skewer or allen key to tap out the old bearings and using a skewer and a shim (ie a socket) to create a makeshift bearing press. Additionally, many experienced mechanics use the hammer and socket method to replace a bearing. Even when using a threaded bearing press, the hammer and socket method is frequently used to make corrections if the bearing starts to come out of alignment.
Although it's not an extremely difficult task and it can be done in under a minute, if you have never done the job before, it might be a good idea to re-install and remove the old bearings a couple of times so you can get a feel for it. With any method, it is always possible to over-do it and push the bearing a bit too deep. If this happens, the bearings will roll tight and you will probably feel a grittiness. This is most noticeable with the larger drive-side bearing. If it is installed too deep, you will be unable to install the smaller bearing effectively without grittiness.
Note that once installed, the only way to remove a bearing is to tap it out against the inner race. This puts impact forces from the inner race through the balls, to the outer race. This will cause pitting and drastically reduce the lifespan of the new bearings. You should not use bearings that have previously been installed and removed. They will not last.
If in doubt, please use a qualified mechanic for bearing replacement. Even if they use a lower quality bearing, you will still get better results than an improperly installed set of high quality bearings.
- There are many different methods used for replacing bearings. At the factory, hydraulic presses are the standard way of operating. The official way to replacing a bearing involves a screw type bearing puller and a threaded bearing press.
Frames
- Mech Hangers
- Dropouts
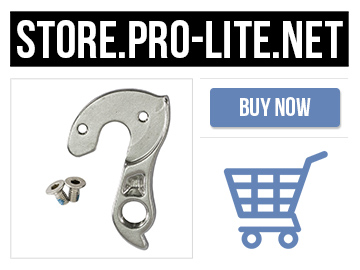 There is a bit more variation between different frame dropouts as we have manufactured them over the years for different disciplines. We have tried to make them all available here on our web store, but some may require a special order.
If you don't see your frame listed, please send us an email via the contact form on this site or on the web store and we will try to get something arranged for you.
- Aerobuster for other brands?
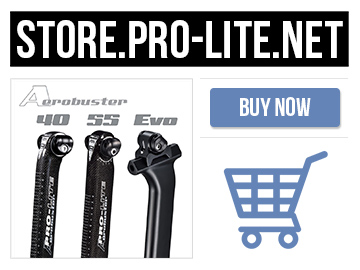 We have made a few different variations of the Aerobuster available over the years.
The original Aerobuster is now described as the Aerobuster 55. It has a 55mm depth from the front of the aero shape to the back and uses a one-bolt rail clamp. The one-bolt clamp has a strong degree of variability to allow for rather extreme saddle angles popular for TT, Tri and Track race positions. The Aerobuster 55 was used with the Trentino GP and Espresso GP frames and may be compatible with the earlier non-GP models of those frames as well, depending on the year.
The Aerobuster 40 is a similar, but smaller design used for aero road frames such as the Veloce CS and Valor.
The Aerobuster Evo is a larger version specific to the carbon Menaggio GP and Modena GP models. It features the same 1-bolt clamp as well as a rail slider for fine-tuning fit for the most demanding requirements.
It's not very common, but if the rail clamp loses the ability to hold friction for some reason, please send us an email and we'll help you out.
You can purchase an Aerobuster Seat Post of any of the three styles on our web store here.
For the Aerobuster 55, it is also possible to run an adaptor for a 27.2mm conventional round seat post on our web store here.
Please note that aerodynamic seat posts are not standardized across brands. Aerobuster seat posts are only suitable for Pro-Lite frames according to their type. We do not claim that any Aerobuster seat post is compatible with any other brand of frame.


